
6 inch cake cutting guide
A 6-inch cake, perfect for intimate gatherings, requires a delicate touch when slicing. This guide ensures beautiful, even portions every single time, effortlessly!
Why a Guide is Necessary
Cutting a 6-inch cake might seem straightforward, but achieving professional-looking slices consistently demands a bit of know-how. Unlike larger cakes, the smaller diameter of a 6-inch cake amplifies any imperfections in technique. A slightly unsteady hand or dull knife can easily result in crumbled edges and uneven portions, diminishing the overall presentation.
Furthermore, a guide helps ensure everyone receives a fair share, especially important when serving guests. Without a systematic approach, slices can vary significantly in size, leading to potential disappointment. This guide provides clear, step-by-step instructions, empowering even novice bakers to confidently tackle this task.
Ultimately, mastering the art of cutting a 6-inch cake elevates the entire dessert experience, transforming a simple treat into a visually appealing and enjoyable indulgence for all involved; It’s about precision, presentation, and pleasing your guests!
Understanding 6-Inch Cake Dimensions
A “6-inch” cake refers to the diameter of the cake pan used, not necessarily the final slice size. Typically, a 6-inch cake yields 8-12 servings, depending on desired portion sizes and the cake’s height. Standard cake layers are often 2-3 inches tall, influencing the overall volume and potential slices.
Visualizing the cake’s dimensions is crucial for planning your cuts. Imagine dividing the circle into equal wedges – a common approach. However, consider the cake’s layers; each layer needs a clean cut to maintain structural integrity. Understanding the height also helps determine appropriate knife depth and angle.
Knowing these dimensions allows for pre-planning, ensuring enough servings for your guests and minimizing waste. It also aids in selecting the right cutting tools and techniques for a clean, professional finish. Accurate understanding is the foundation for successful cake cutting!
Tools You’ll Need for Precise Cutting
For achieving flawless slices, gather a long, serrated knife, an offset spatula, and potentially a cake lifter. Precision tools equal perfect portions, always!
Essential Cutting Tools: Knives & Spatulas
The cornerstone of any successful cake cutting endeavor is, undoubtedly, the knife. A long, serrated knife – ideally between 8-10 inches – is your best friend. The serrations allow you to saw through the cake layers without excessively compressing them, resulting in cleaner cuts and less crumbling. Avoid using a dull knife, as this will only exacerbate the crumbling issue.
Alongside the knife, an offset spatula is invaluable. It’s not directly involved in the cutting process, but it’s crucial for lifting and transferring slices neatly. The offset angle provides leverage and control, preventing the cake from tearing or falling apart. Furthermore, a spatula can gently smooth any minor imperfections on the cut edges, presenting a polished final product. Consider having both a small and a larger offset spatula for versatility.
Investing in quality tools will significantly improve your cake-cutting experience and the overall presentation of your delightful 6-inch creation!
Optional Tools: Cake Lifters & Turntables
While not strictly necessary, cake lifters and a turntable can elevate your cake-cutting game from competent to professional. A cake lifter, typically a large, flat metal spatula, simplifies the transfer of slices from the cake stand to serving plates. This minimizes the risk of damaging the delicate cake and ensures a graceful presentation.
A turntable, or cake rotating stand, is particularly useful for achieving consistent slice sizes and clean cuts. By rotating the cake while holding the knife steady, you create a smooth, even sawing motion. This is especially helpful when cutting multiple slices or dealing with cakes that have intricate decorations. It also provides better control and reduces the chance of smudging frosting.
These tools aren’t essential, but they offer convenience and precision, making the process easier and the results more visually appealing for your 6-inch cake!
Preparing the Cake for Cutting
Proper preparation is key! A chilled cake cuts cleanly, while removing decorations beforehand prevents unwanted smudges and ensures a pristine presentation, always.
Chilling the Cake for Clean Slices
Chilling your 6-inch cake before cutting is arguably the most crucial step for achieving neat, professional-looking slices. A cold cake holds its shape far better than one at room temperature, minimizing crumbling and ensuring clean edges. Ideally, chill the cake for at least 30 minutes, but longer – even up to a couple of hours – is beneficial, especially for softer cake varieties like chiffon or sponge.
The cold temperature firms up the buttercream or frosting, providing resistance to the knife and preventing it from dragging or tearing the cake. This is particularly important if you’ve used a softer frosting. Don’t freeze the cake solid, as this can alter the texture; a firm chill is all you need. Remember to consider the filling – some fillings become very hard when chilled, potentially making cutting more difficult, so adjust chilling time accordingly. A well-chilled cake is a happy cake, and a happy cake cuts beautifully!
Removing Decorations (If Applicable)
Before you begin cutting your 6-inch cake, carefully assess any decorations. While some, like simple sprinkles, won’t interfere with slicing, others require removal to ensure clean cuts and prevent damage. Delicate sugar flowers, intricate piping, or fresh fruit should be gently detached before you start. Use a small, clean spatula or a pair of tweezers to lift decorations without smudging the frosting.
Consider whether the decorations are reusable or edible. If edible, you can offer them as a separate treat alongside the cake slices. If reusable, store them carefully for future decorating projects. Don’t attempt to cut through hard decorations like fondant figures; this will dull your knife and ruin the presentation. Prioritizing decoration removal guarantees a smoother cutting process and a more visually appealing final result. A little preparation goes a long way!

Cutting Techniques: Basic Slices
Mastering the fundamental wedge cut is key! Employ a gentle sawing motion, rotating the cake for uniformity, and achieving delightful, presentable slices consistently.
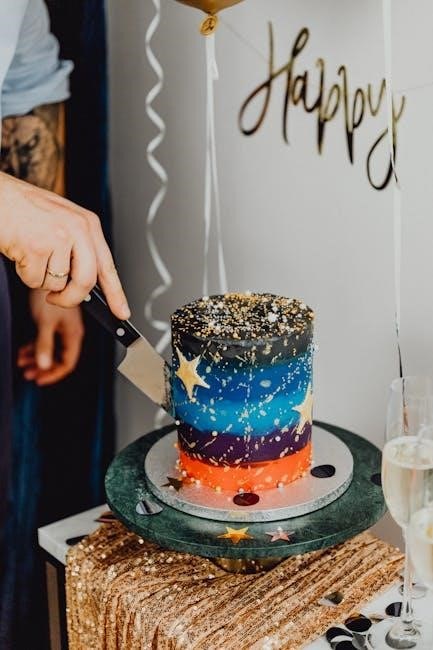
The Standard Wedge Cut: Step-by-Step
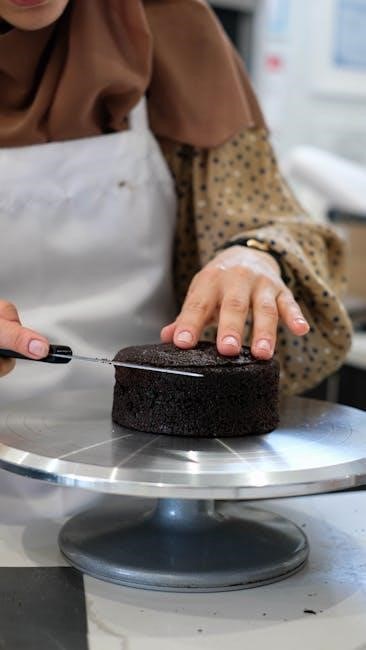
Begin by positioning your 6-inch cake on a stable surface, ideally a cake turntable if you have one. Using a long, sharp knife – a serrated knife works wonderfully – mark a starting point at the center of the cake.
Gently press the knife down, then, using a back-and-forth sawing motion, begin to cut outwards from the center. Avoid applying excessive pressure; let the serrations do the work.
As you cut, slowly rotate the cake (or the turntable) to maintain a consistent wedge shape. Continue sawing and rotating until you’ve cut through the entire cake.
For subsequent slices, repeat the process, adjusting your starting point at the center to create evenly sized wedges. Wipe the knife clean between each cut to ensure clean slices and prevent frosting buildup. Remember, patience and a gentle touch are crucial for a perfect result!
Achieving Even Slice Sizes
Consistency is key when aiming for uniform cake portions. Visualize the cake divided into the desired number of slices – typically 6 to 8 for a 6-inch cake. Before cutting, mentally mark these divisions.
Utilize the turntable! Rotating it incrementally between each cut ensures each wedge receives an equal angular measurement. Alternatively, if not using a turntable, carefully reposition the cake after each slice.
A helpful trick is to lightly score the cake with the knife at the desired slice points before making the full cut. This provides a visual guide.
Finally, don’t be afraid to adjust slightly. If a slice appears larger, take a small amount from it with the next cut. Practice makes perfect, and soon you’ll be a pro at portioning!

Advanced Cutting Techniques

Beyond basic wedges, explore precise shapes and cater to specific needs. Mastering these skills elevates presentation and accommodates diverse dietary preferences seamlessly.
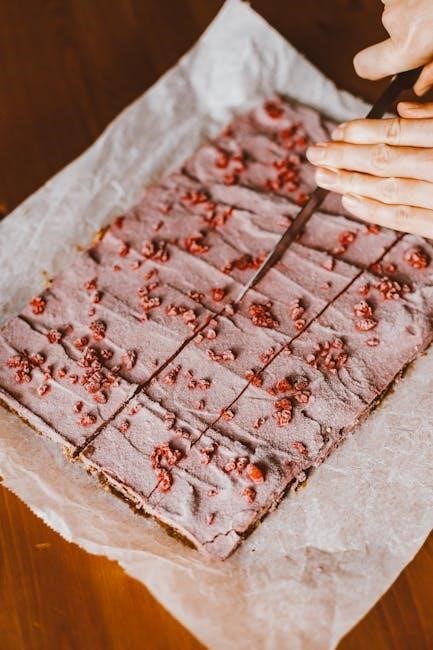
Cutting Square or Rectangular Portions
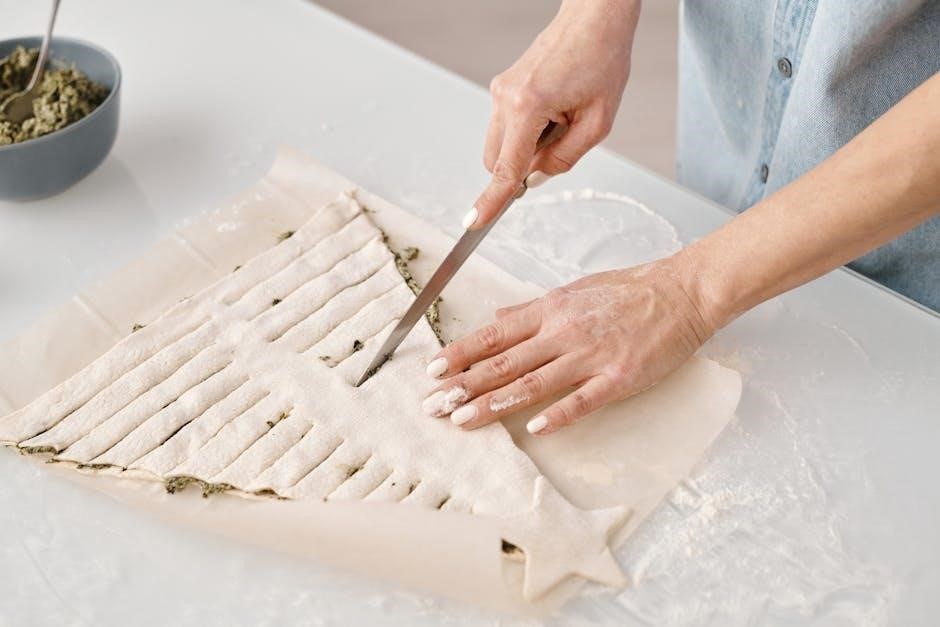
For a modern aesthetic or to maximize servings, square or rectangular portions are an excellent choice. Begin by lightly marking the cake’s surface with a sharp knife, creating a grid based on your desired portion sizes. A ruler can be incredibly helpful for precision, especially with smaller cakes.
Using a long, thin-bladed knife, gently cut along the marked lines. Employ a sawing motion rather than pressing straight down, minimizing crumbs and maintaining clean edges. Wipe the blade clean between each cut to prevent frosting smudging.
For perfectly straight lines, consider chilling the cake thoroughly beforehand; a firmer cake holds its shape better. Lift each portion carefully with a spatula, ensuring it doesn’t stick to the cake board. This technique is ideal for layered cakes, providing a neat and organized presentation, and is particularly favored for desserts served with accompaniments like fruit or sauce.
Cutting for Specific Dietary Needs (e.g., Gluten-Free)
When catering to dietary restrictions, like gluten-free needs, preventing cross-contamination is paramount. Use a dedicated, thoroughly cleaned knife – ideally one only used for gluten-free cakes. Avoid cutting gluten-containing desserts immediately before or after a gluten-free cake, even on the same cutting board.
Consider using disposable gloves to handle the cake and serving utensils, adding an extra layer of protection. Clearly label the cake as “Gluten-Free” to avoid confusion. When serving, use separate serving utensils to prevent accidental cross-contamination from other desserts.
For guests with severe allergies, inquire about other potential allergens and take appropriate precautions. A small, separate portioning tool can be helpful. Prioritizing safety and clear communication ensures everyone can enjoy the cake with peace of mind, and demonstrates thoughtful consideration for your guests’ health.
Serving & Storage After Cutting
Present slices elegantly on plates, perhaps with a fresh berry. Store leftover cake airtight at room temperature for up to three days, or freeze!
Proper Serving Suggestions
Once your 6-inch cake is beautifully cut, presentation is key! Consider the overall aesthetic you’re aiming for. For a casual gathering, simple plates are perfectly acceptable. However, for a more formal occasion, opt for dessert plates that complement the cake’s colors and design.
A small dollop of whipped cream or a scoop of vanilla ice cream alongside each slice elevates the experience. Fresh berries – raspberries, strawberries, or blueberries – add a vibrant touch and a burst of flavor. A light dusting of powdered sugar can also create an elegant finish.
Don’t forget about beverages! Coffee, tea, or a dessert wine pair wonderfully with most cakes. Consider the cake’s flavor profile when selecting your drink. For chocolate cakes, a robust coffee is ideal, while a lighter tea complements fruit-flavored cakes. Finally, ensure each guest has a fork and napkin for a comfortable and enjoyable experience.
Storing Leftover Cake to Maintain Freshness
Proper storage is crucial for preserving the deliciousness of your 6-inch cake. If frosting is buttercream-based, store the cake in an airtight container at room temperature for up to three days. This prevents it from drying out. For cream cheese frosting or cakes with fresh fruit, refrigeration is essential – store in an airtight container in the refrigerator for no more than five days.
To prevent sticking, place a piece of parchment paper between the cake and the container. You can also individually wrap slices in plastic wrap before placing them in the container. If freezing, wrap the cake tightly in plastic wrap, then in aluminum foil, and freeze for up to two months. Thaw overnight in the refrigerator before serving.
Remember, the sooner you store leftover cake, the better it will taste! Avoiding exposure to air is key to maintaining moisture and flavor.
Troubleshooting Common Cutting Issues
Even with care, cake cutting can present challenges. Here’s how to address crumbling or uneven slices, ensuring a polished presentation and delightful enjoyment!
Dealing with Crumbling Cake
A crumbling cake can be frustrating, but several techniques can minimize the mess and maintain a presentable slice. First, ensure your knife is truly sharp – a dull blade requires more pressure, exacerbating the issue. Warming the knife slightly under hot water before each cut can also work wonders; remember to dry it thoroughly!
Gentle sawing motions, rather than pressing straight down, are crucial. Avoid rushing; slow and steady wins the race. If the cake is particularly delicate, consider chilling it for a longer period before cutting, as colder cake tends to hold its shape better.
For cakes that crumble despite your best efforts, a light dusting of powdered sugar over the cut edges can help disguise imperfections. Alternatively, strategically placed fresh berries or a delicate frosting swirl can elegantly conceal any minor crumbling, transforming a potential flaw into a charming detail.
Fixing Uneven Slice Heights
Inevitably, achieving perfectly uniform slice heights can be tricky, especially with homemade cakes. If you notice discrepancies, don’t despair! A small offset spatula is your best friend here. Gently transfer small amounts of cake from the taller slices to the shorter ones, smoothing the frosting as you go. This redistributes the cake, creating a more visually appealing and equitable serving.
Alternatively, embrace the variation! A slightly rustic presentation can be charming. Enhance the visual balance by adding a generous dollop of whipped cream or a scattering of fresh fruit on each slice, drawing attention away from minor height differences.
Remember, the goal is enjoyment, not perfection. If the unevenness is significant, consider serving slices with a side of complementary elements like sauce or custard, which can level the playing field and enhance the overall dessert experience.
Leave a Reply
You must be logged in to post a comment.